Introduction to Arduino
Let’s start by understanding what Arduino is and what it can do for you as a beginner in electronics.
Installing the Arduino IDE
Before you can start programming Arduino, you need to install the Arduino IDE — the official development environment.
Blink: Your First Arduino Project
Let's build your first real Arduino project — make an LED blink!
Understanding Arduino Code Structure
Learn how Arduino code is structured and how setup() and loop() work together.
Working with Digital Output
Learn how to control components like LEDs, buzzers, and relays using digital pins.
Working with Digital Input
Learn how to use buttons and switches with Arduino and respond to user input.
Working with Analog Input
Learn how to read variable values from sensors using analog pins.
Working with Analog Output (PWM)
Use analogWrite() to control brightness, speed, and more with Pulse Width Modulation.
Final Assessment & Certificate
Take this final quiz to test your knowledge. Score 71% or more to earn your certificate!
This feature has been disabled by the administrator

About Lesson
To make an LED blink, you need a few basic components:
🔹 1x LED
🔹 1x 220Ω resistor
🔹 Breadboard (optional in this case)
🔹 Jumper wires
🔹 Arduino Uno board
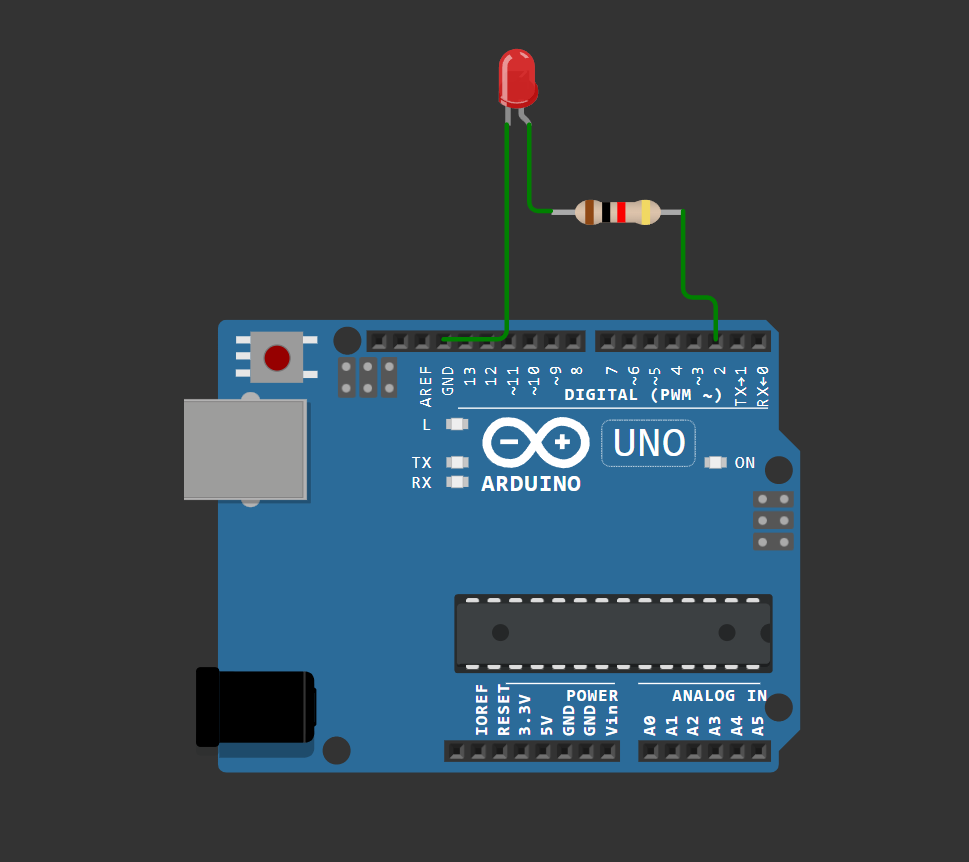
📌 Connect as follows (like in the diagram):
– Long leg (anode, +) of the LED → **Digital pin 2**
– Short leg (cathode, –) → One side of the resistor
– Other side of the resistor → **GND** on the Arduino
✅ This connection allows current to flow from pin 7 through the LED and resistor, safely to ground. The resistor limits the current to protect the LED.
⚠️ Make sure the longer leg of the LED goes to pin 7, and the shorter one through the resistor to GND.


